Showing posts with label kids. Show all posts

Wednesday, January 22, 2014

Tie Dyed Butterflies and Disappearing Ink!


I'm finally getting around to posting some of the crafts I did previously with the kiddos. This one was a HUGE hit. All you need are some coffee filters (any size will do, although I used the white/bleached filters), markers, a little bit of water, and a paint brush. Pipe cleaners and scissors are optional.

This project is super easy. First flatten out the coffee filter a bit. This just makes it easier to write on. Next let the kids go wild with the markers on the filter. Next you take a small amount of water, dip the paint brush into it, "paint" the filter with the water, and voila! The ink starts to bleed through the filter and make really awesome designs. Once you've finished with the water, just place the filters on some paper towels to dry. The marker ink does bleed through a bit so best to put something underneath it when it's drying and also doing the project on a counter or something that can be wiped down.


I introduced this project as disappearing ink. Since one of the kids was learning how to write, she had a blast writing some random letters or names and then watching them disappear (well, spread out so the words went away) with the water.


Here are some examples of before and afters:


Once the filters are all dry, you have some more neat options. You can cut the filters up into shapes, like hearts or stars. We also made them into butterflies by pinching the entire filter down the middle and wrapping a pipe cleaner around it. We found that if you put them up on the window with a little tape, they made pretty sun catchers as well.


Another option is to turn the tie dyed filters into presents. For mother's day the kids made a bunch of these tied dyed filters on mini coffee filters. I then cut out rectangles from the filters and used a glue stick to attach them onto card stock to make blank cards. I added the date and the initials of the child as an added bonus. The mom loved them!! They did come out quite well, I must say!


 I hope you love this craft as much as we did!

Friday, September 20, 2013

DIY Moon Sand


When I started nannying, I researched a lot of activities. I mean a LOT of activities. There are few activities I barely go through. Others that were fun. But there were few that the kids requested over and over. And this was one of them. So to sum it up...

Moon sand is AWESOME!!

It is super easy too. You only need two ingredients: baby oil and flour.

The ratio is 8 parts flour to 1 part baby oil. You just put the whole kit and kaboodle together and mix it all up.

Then the fun begins. Moon sand is moldable if you smoosh it and will hold shape if you want it to. We brought out cups to make little castles.

 Seriously the kids LOVED this stuff. The was soft and smooshy and it smells awesome! They played with this stuff for hours. And the kids asked for it over and over.

The best part is that you can keep the moon dust in an airtight container forever (or so it seems). You just add some baby oil if the mixture gets too dry.

The only bad thing is it can be a little messy, but it cleans up pretty easy.

Trust me, if it's a rainy day or just a day when the kids are bored, bust out the flour and baby oil. You'll thank me later :)

Tuesday, July 2, 2013

Suncatchers!


For my first kids arts and crafts project, I HAD to go with these suncatchers! Since I started nannying I have done these nearly every month with a theme that goes with the month (February was hearts, March was shamrocks, etc). The best part about this craft is you can do it in any shape you want and it looks awesome! Plus the kids love doing this project.

I saw this idea originally on Pinterest from a great blog called No Time For Flash Cards. I knew I had to do it as soon as I saw it.

Here's what you'll need:

Supplies
Contact paper
Construction paper
Scissors
Streamers or tissue paper

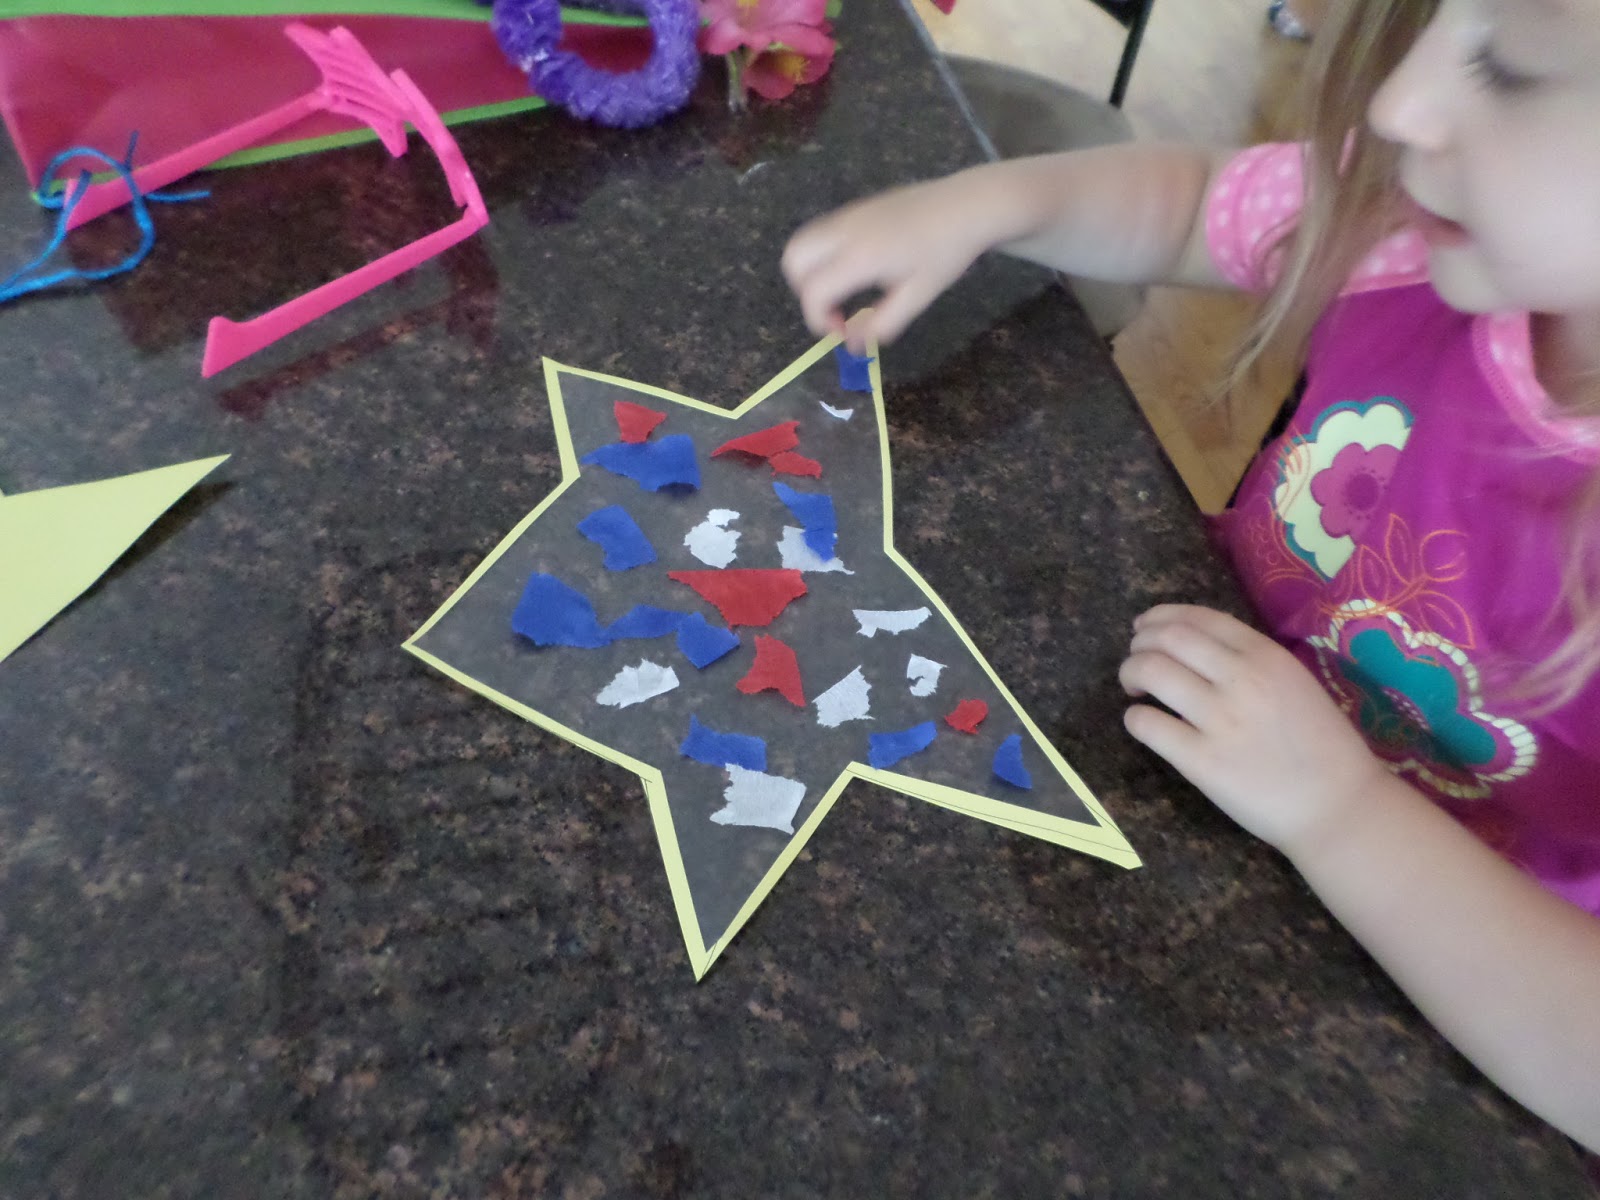
I went with a Fourth of July theme so we used red, white, and blue party streamers. You could also use tissue paper, but this worked just as well and I got them in two packs at the dollar store. Whoo hoo! I have also used the plastic stuff that goes in Easter baskets. Actually you can use pretty much anything that you can sort of see through.

The first step is to cut out the design you want to use. I used regular construction paper and cut out the largest star I could. Then you'll want to cut out a smaller version of the same design from the inside leaving a thin outline of your design. No Time For Flash Cards used a bigger "frame", if you will, but I liked having more of the middle open for sticking. Just a personal preference.


Next you'll want to cut off enough contact paper that the whole open area is covered. Peel the paper off the back and stick the open design onto the contact paper. Then cut around the outside to remove the excess contact paper. 

Then you'll want to get the streamers ripped up in to little pieces. I tried to get the kids to do this the first time, but they weren't so into it. However, if you're kids like to rip stuff up, let them rip away! You don't need a whole lot, which is why I love the streamers because you could do this activity over and over and never run out! Put the ripped up pieces into a bowl or on a plate.  


 Now comes the fun part. Put the star (or whatever design you have chosen) down with the sticky side up and have the kids put the ripped up pieces onto the contact paper.

 And one of the best parts is that once it's all done, you can just stick it onto a window! Well, that is as long as there is still space where the contact paper is not used. I've left them up for nearly two months and they peal right off when you want to put up a new one without any problem or residue (that I could see). Doesn't it look pretty?? And when the sun shines through the window it looks very cool.


And here are a couple we did previously in case you are looking for inspiration for shapes. The butterfly one used the Easter grass I mentioned previously.