Thursday, February 28, 2013

Tres Leches Cake

Ok ok, so I made a plan to post more, but I failed miserably with that. I have, however, been doing new recipes and doing nifty projects. Now it's just time to post them! Alright, back to the fun stuff...

I am a sucker for cake. It just makes me happy. I can't help it! When I checked out this recipe for Tres Leches Cake courtesy of The Pioneer Woman, I was a bit concerned. There was a LOT of liquid being poured onto that cake! But I decided to give it a shot....And here we go!

Here's what you'll need. Look at all that liquid!!


First you add all the dry ingredients together. Then you need to separate a whole boat load of eggs. Oh yes, this recipe is SUPER HEALTHY! That's why it tastes so good :) Check out the nifty egg separating doohickey I found in the kitchen. It made my life so much easier and was awesome! I must buy one...But I digress.
 

 Throw those yolks in the mixer with the sugar and get mixing!


 Then add the milk and vanilla and mix some more! But this time only a little bit.


 Once it is combined, add the yolk-y yummy mixture (don't eat it though. you know, salmonilla and all that jazz) to the dry ingredients. Mix just to combine. 

Now quickly clean the mixer and the bowl and get to whipping up the egg whites to some nice peaks. I always find it nuts that egg whites can turn into such fluffiness!! Thank you to Alton Brown from Good Eats for letting me know why that happens! I love that guy...But again I digress....Beat the eggs to soft peaks then add the sugar and beat some more till the peaks are stiff.


Fold the egg white mixture into the egg yolk mixture but just until combined! Then add it to the baking dish.


 Bake that baby for 35-45 minutes. Once it's done, take it out and allow it to cool. Then poke a bunch of holes in it with a fork. Like a lot of holes.I had a bit of an issue finding a plate to put this cake on so we had to cut it a bit first (quality control and all) and I put it on the best plate I could find. Ideally you want a plate that the cake can sit in and has a rim of some sort.


 Next is the odd part (at least it was for me). Combine the sweetened condensed milk, evaporated milk, and heavy cream together. I warned you this wasn't the healthiest of cakes! Once it's all together, pour all but 1 cup of the milky concoction onto the cake. Yes, you read that right. Pour the it all over the cake including the edges. I freaked out a little when I did this at first because the milk sort of sat there initially, but if you waited it all got sucked up by the cake! Craziness....


Give the cake 20-30 minutes to suck up all the goodness. Then it's frosting time! Well, whipped cream time. Add the heavy cream and the sugar to the mixing bowl and whip it up good.


 Once the frosting seems to the consistency of your liking, ice the cake and voila! You're done.


I have to say I was a bit skeptical about this cake, but it was delicious! Be forewarned that the bottom of the cake in the middle can get extra mushy if you have plate that isn't entirely flat under the whole cake, but we ate it regardless. Enjoy!!

Tres Leches Cake
Source: The Pioneer Woman

1 cup flour
1-1/2 tsp baking powder
1/4 tsp salt
5 eggs, divided
1 cup sugar, divided
1
tsp vanilla
1/3 cup milk
1 can evaporated milk
1 can sweetened, condensed milk
1/4 cup heavy cream


Frosting:

1 pint heavy cream
3 tbsp sugar


1. Preheat oven to 350 degrees. Grease or spray a 9 x 13 inch pan.
2. Combine flour, baking powder, and salt in a large bowl.
3. Separate eggs and beat egg yolks with 3/4 cup sugar on high speed until yolks are pale yellow. Stir in milk and vanilla. Pour egg yolk mixture over the flour mixture and stir very gently until just combined.
4. Beat egg whites on high speed until soft peaks form. With the mixer on, pour in remaining 1/4 cup sugar and beat until egg whites form stiff peaks. 
5. Gently fold egg white mixture into the batter until just combined. Pour into prepared pan.
6. Bake for 35 to 45 minutes or until a toothpick comes out clean. Turn cake out onto a rimmed platter and allow to cool.
7. Combine condensed milk, evaporated milk, and heavy cream in a small pitcher. When cake is cool, pierce the surface with a fork several times. Slowly drizzle all but about 1 cup of the milk mixture onto the cake.
8. Allow the cake to absorb the milk mixture for 30 minutes.
9. For frosting whip 1 pint heavy cream with 3 tablespoons of sugar until thick. Spread over the surface of the cake.

Sunday, January 13, 2013

Cream of Asparagus Soup

Each year so many of us tell ourselves that we are going to get healthy as part of our new years resolution. For me, this means more than just losing weight. It means getting physically healthy enough to finally actually run the NYC Marathon that I have been registered for and been unable to run for the last 2 years due to injuries. Although these goals clearly involve exercise (I'm still working on that), they also involve eating a tad better and watching those portions and added calories that can sneak up throughout the day!

This year, I'm doing my new years resolution alongside my parents who also are hoping to lose some weight this year. We may all be prompted by the fact that my brother is getting married later this year and I am totally ok with admitting that! ha. I'm trying to keep us all on track with weekly weigh ins and measurements and we all are eating meals together to minimize the junk. So when I initially saw this recipe on Closet Cooking, I thought it would be a great addition to one of our meals!

The recipe is super simple and requires minimal time or ingredients. Here's what you need:

And when I say it's simple, I really mean it. You just throw the asparagus (cut up into smaller pieces) and chopped onions into the chicken broth. Then simmer it for 7-10 minutes until the asparagus is tender and then puree the heck out of it. I used an immersion blender to minimize messiness.


Then you add the yogurt and miso. Stir it up and you're good to go! I thought it was a little thin at first, but it ended up being the perfect consistency. We added a little parmigiano-reggiano grated on top, but it probably didn't need it. Enjoy!


Cream of Asparagus Soup
Adapted from Closet Cooking

1 bunch of asparagus, washed and cut into 1 inch pieces
2 small onions, chopped
2 cans of chicken broth (approximately 4 cups)
1/4 cup miso
1/4 cup plain yogurt

1. Place chicken broth, asparagus, and onion a pot and bring to a boil.
2. Reduce to a simmer for 7-10 minutes until the asparagus is tender.
3. Remove from heat and puree the mixture.
4. Stir in yogurt and miso.
5. Serve and garnish with parmigiano-reggiano if desired.

Serves 4-6

Saturday, January 12, 2013

Chicken Tacos

I don't make/have tacos very often. Not because I don't like it, but rather I often debate if the mess is worth it. When I came across this recipe courtesy of Smitten Kitchen (a food blog that I LOVE), it just looked so healthy and fresh that I couldn't resist! I mean look at the ingredients! The original recipe called for chicken thighs, but I'm not a fan of dark meat so I opted for chicken breasts.

 I was a smidge confused at first since I don't often boil chicken, but I decided to forge ahead! It was quite easy since you throw all the ingredients in a large pot and simmer the hell out of it!


The original recipe calls for you to allow the chicken to cool and then to shred it. Allow me though, dear readers, to give you an AMAZING hint when it comes to shredding chicken. If you happen to be in possession of a Kitchen Aid mixer (or something comparable I'm sure) then throw the chicken into the bowl (even still hot) and using the normal mixer attachment turn that puppy on. Within seconds you will have perfectly shredded chicken and no burned fingers! Behold....


Seriously, this took like 15 seconds. A-w-e-s-o-m-e.

In the end, I also made the salsa fresca recommended by Smitten Kitchen, some rice and beans, and had some cheese and avocado as additional toppings.

The result was a super fresh and light meal that tasted yummy and a definite crowd pleaser! I forgot to take a picture BEFORE I started eating the taco I put together (sorry), but that just goes to show how good it was! ha. Enjoy!

Chicken Tacos
Adapted from The New York Times via Smitten Kitchen

1.5 pounds chicken breasts
1 large white onion, peeled and quartered
5 cloves garlic, peeled and lightly crushed
2 bay leaves
1 tablespoon ground cumin
Salt and pepper to taste.

1. Combine all ingredients in a large saucepan and add water until chicken is covered.
2. Bring mixture to a boil using high heat and skim foam that may emerge off the surface.
3. Partially cover and lower heat so that the water simmers steadily for about 30 minutes or until the meat is very tender.
4. Remove chicken from liquid.
5. Shred chicken with mixer while hot or with your fingers once the chicken has cooled enough to handle.
6. Adjust seasoning as necessary.
7.Serve with salsa, shredded cheese, avocados or guacamole, and taco shells.

Serves 6 to 8

Monday, December 17, 2012

Oohhh Crack Bread!

Yesterday my family celebrated Christmas early because my sister is a nurse and usually cannot get Christmas off. Instead we celebrate together before Christmas which works out pretty well for us with the exception of having to purchase presents earlier. I decided to make Crack Bread as part of our celebration during the day. We had it after dinner since we ate super early and figured we all would be hungry at some point.

I think my family is starting to worry about me making so many items that I call "crack." C'est la vie!

The bread is apparently actually called Cheddar Bacon Ranch Pull Bread. The first three words are music to my taste buds...It's quite tasty and as you can tell see from the ingredients, not the healthiest either. But it's the holidays!

I found the recipe originally on Plain Chicken and it is pretty easy to make. The most difficult part is the cutting of the bread. Here's what you'll need:

You can find the original recipe here. The first step is to cut up the bread, but not all the way through to the bottom of the loaf in a checkerboard like pattern.Next you put little pieces of cheese in each of the little spaces like so. Make sure it's nice and thin so that it melts correctly. I made the cuts a bit too thick.
 

Then you add the bacon bits using the same method and pushing them down into the bread. 
Then you mixed the ranch mix and the butter and pour it over the entire loaf. Next cover it in tin foil and bake it for 15 minutes at 350 degrees. Then uncover the loaf and cook for another 10-15 minutes. How yummy does this look?
I was going to take a picture of us eating it, but once it was out on the plate I didn't stand a chance! So enjoy!

On a different note, I'm making a resolution for next year. My plan is to make a new item from Pinterest each week, be that a recipe, craft, or just a random trick or tip. Hopefully I will be able to keep it up! For those few of you who might read this, let me know if you have any suggestions!

Sunday, October 14, 2012

Caramel Apple Cider Cookies...My oh my

I have been staring at this pin on Pinterest for, well, ever, but never got around to make it until yesterday. I mean I love caramel and apples and cookies so this seemed like a no-brainer.

Now yesterday seemed like the first real day of fall with the chill and it was homecoming in my hometown so I thought it was as good a day as any for cookies. This recipe came from Scrambled Henfruit. Here's what you need.

Prep work time! I needed a slightly bigger bowl....C'est la vie. And can I just say that unwrapping caramels is a pain in the ass!!


Hello dough. ha

I was supposed to put the dough in the fridge for an hour, but I am impatient. I probably should have listened, however, since this stuff was super sticky and was all over my hands.

Now you see the caramel. Now you don't!


 Pre- and post-oven cookies


 And here's the finished product! Super yummy!


Couple recommendations though. Make sure you let the cookies cool before you take them off the parchment paper so that the caramel doesn't ooze out the bottom. Also if you don't eat the cookies soon after they come out of the oven, reheat them a little in the microwave so that the caramel is oozy again.

Enjoy!!

Caramel Apple Cider Cookies
Source: The Cooking Photographer via Scrambled Henfruit
Makes 3-4 dozen cookies (mine made 3)

2 sticks of butter, softened
1 cup sugar*
1/2 tsp salt
1 box Alpine Spiced Apple Cider Instant Drink Mix (all 10 packets)*
2 eggs
1 tsp vanilla
1 tsp baking soda
1/2 tsp baking powder

1 tsp cinnamon
3 cups flour
1 (14 oz.) bag caramels


*I could only find Sugar-Free so I added an extra 1/2 cup of sugar (1 1/2 total), just because. 

Preheat the oven 350° F. Line the cookie sheets with parchment paper otherwise you'll have a sticky mess! Set the cookie sheets aside.

Combine the dry ingredients (flour, baking soda, baking powder, salt, and cinnamon) in a separate bowl.

In your mixer, add the butter, sugar, and apple cider mix and beat it until it's fluffy and smooth. Add the eggs and vanilla and mix until combined. Next add the flour mixture slowly into the mixer until just combined.

If you have time, refrigerate the dough for an hour. It will help to make the dough easier to deal with. If not, full speed ahead! But you have been warned...

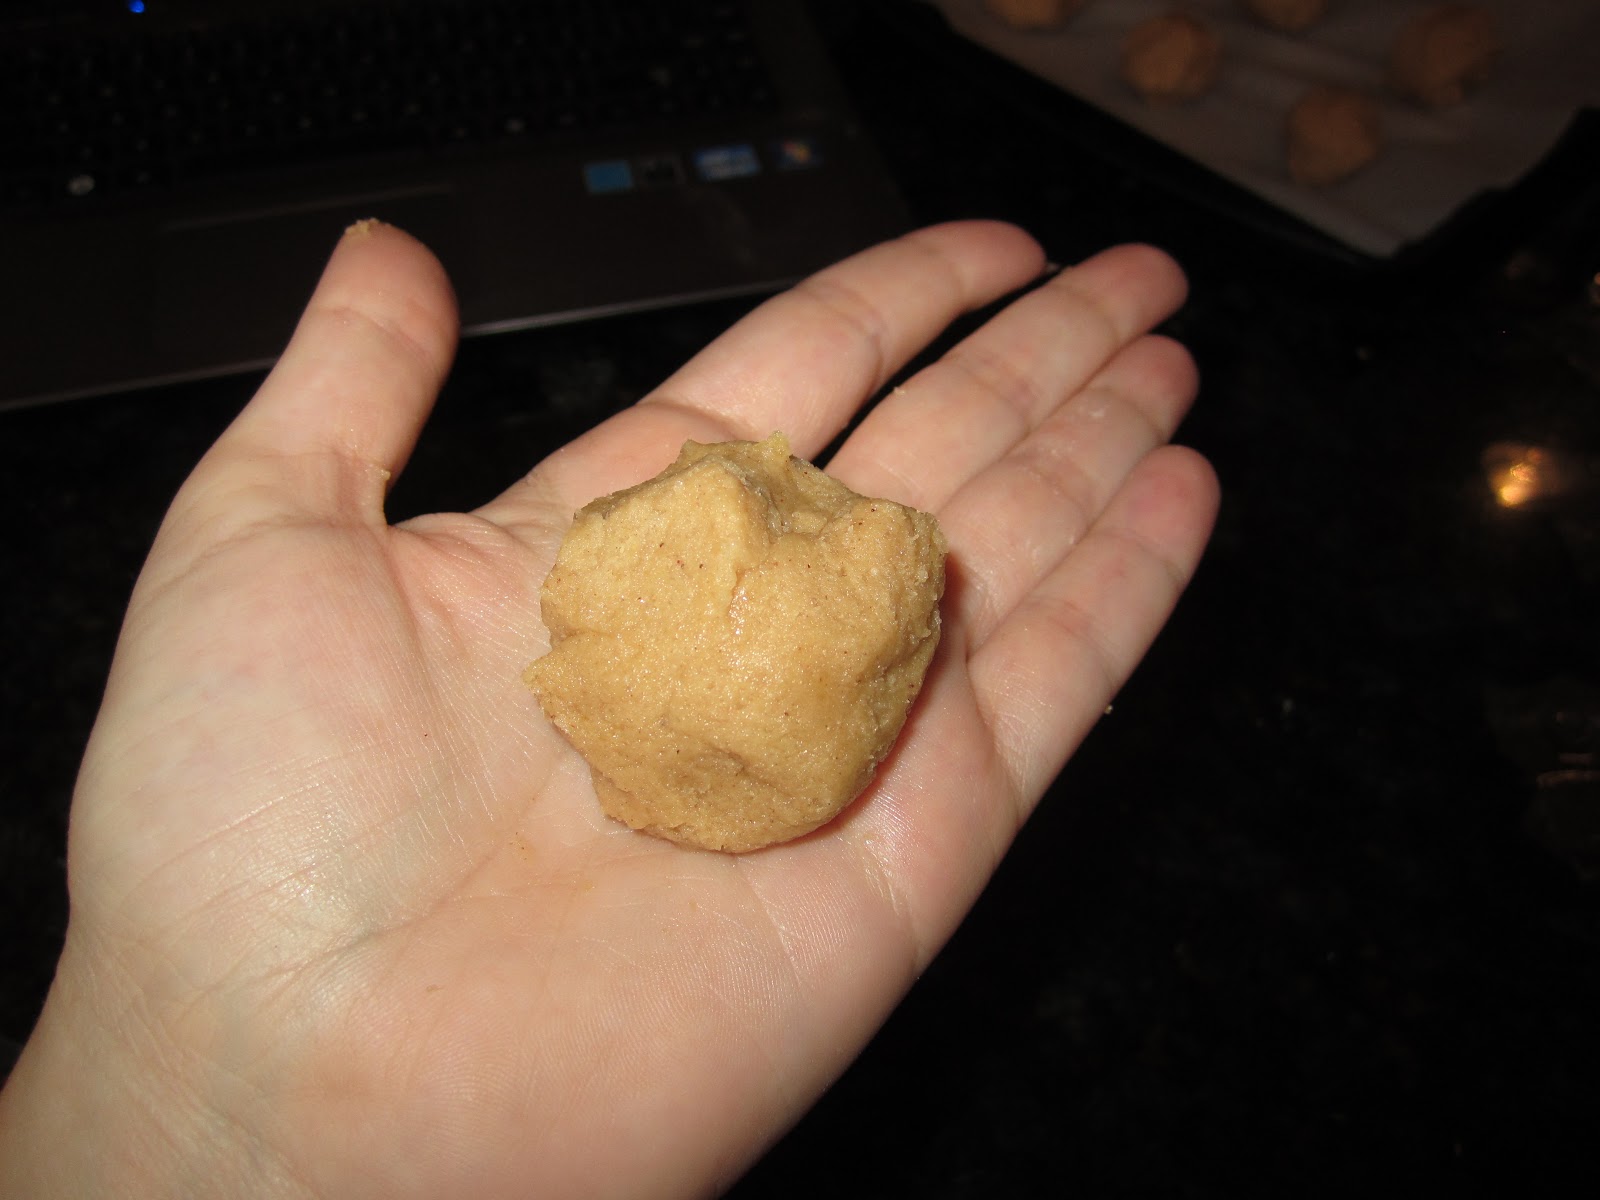
Unwrap all the caramels. Scoop out about a tablespoon of dough. Flatten the dough out in your hand, place a caramel in the middle, and wrap the dough around the caramel. Make sure the caramel is completely covered. Then place the cookie on the parchment lined cookie sheet 2 inches apart.

Bake the cookies for 12-14 minutes (mine took more towards the 14) or until very lightly browned around the edges.

After the cookies are done, lift the parchment paper off the baking sheet and allow it to cool on the counter. DON'T TOUCH THEM until they are cooled a bit. Then twist the cookies off and store in an air-tight container.

Wednesday, October 10, 2012

Potato Leek Soup!!

For today I am not doing a Pinterest recipe. I know, crazy right? Instead this is a recipe that comes straight from The Book and surprisingly I've never made it until today. That seems so, so wrong. C'est la vie.

I have now learned the error of my ways....

True, this recipe was done more out of necessity than anything else, but whatever. My mom intended to make the soup but then didn't have time to make it before she left for a vacation. This meant the leeks were getting to that point. You know what point I'm talking about...

Anyway, the soup is amazing and it was my responsibility to make it. So here we go!

Since the recipe is just written in The Book, I don't know where it came from initially.

Here's what you need:

Ingredients

2 smaller leeks or 1 larger leek
twine
coffee filter (optional)
2 bay leaves
20 black peppercorns
4 sprigs fresh thyme
2 tbsp butter
2 strips of bacon, chopped
1/2 cup dry white wine
5 cups chicken broth
1-1 1/4 lbs russet potatoes, diced
1 1/2 tsp salt
3/4 tsp pepper
1/2-3/4 cup heavy cream

The first step is to make a thingy (I'm so eloquent) that ties up the bay leaves, peppercorns, and thyme. The recipe recommended to tie it all up in a leek leaves. I am not NEARLY that coordinated so I used a coffee filter because my klutziness can handle that.


 Then put that little puppy aside. You'll use him later.

I like to chop up everything first because I am just not coordinated to do it when it's necessary. So here comes the leeks. You'll want to cut off the white-er parts, cut them in half length wise, and then rinse them. You'd be shocked at how much dirt is in there! Once it's washed, cut it across

Next peel and chop up the potatoes. Actually I have no idea if you're supposed to peel them, but I did it anyway. Then chop up the bacon. I used 3 slices because I really like bacon.

Once everything is chopped up, you're good to go. Put the butter in a large soup pot over medium heat and add the bacon once the butter is melted. Cook for about 5 minutes stirring occasionally until the bacon is soft. Yum!!!


Next add the leeks and cook about 5 minutes until they are wilted. It's starting to look pretty. 
Next add the wine and bring it to a boil. You'll see from the first picture I used frozen wine. Did you know you can save your wine by putting it in the freezer?? Food for thought...Moving on...Once it boils, add the coffee filter thingy, the chicken broth, potatoes, salt, and pepper. Bring that to a boil then reduce the heat to a simmer and cook for 30 minutes.

Once it's cooked, take out the coffee filter thingy and use an immersion blender or a food processor (I vote immersion blender). Just be sure not to use the blender to much. It's still good, but there is something about it being a smidge thicker. Here is the before, during, and after:

 Then add the heavy cream and voila! You're done!


Bon Appetite! Now go make this. I mean it. Do it now! You'll thank me later :)